Friday, December 30, 2016

Divers Hip Rafters with Saint Andrews Cross

From geometrical theory to task model to the jobsite.

When I started studying  L'Art du Trait  4 years ago the terms divers and trait carre seemed hard to comprehend. Now the divers hip rafters are as easy to cut as a plumb hip rafters.
dévers de pas  = DP line, shadow line
dévers hip rafter  =  canted hip rafter, top edge of hip rafter rotated into the roof surface plane.
trait carré  = perpendicular , 90° angle


The divers hip rafter can be cut the same way you cut plumb hip rafters, once you have the  angles.  The Saint Andrew Cross purlin rafters need to be laid out using the draw down roof surface method. 


Draw down roof surface. The 2 blue lines represent the top edge of the hip rafter and the bottom edge of the profile rafter. These lines allow you to scribe the miter angle on the sides of the rafters. The draw down roof surface works for any rafter that has it top edge set in the roof surface. 


Steps for laying out the diverse hip rafter:

First I used the Diverse Hip Rafter Boucher  drawing method developed by Olivier Phojo. You can draw it out on a piece of plywood or a CAD drawing program. This gives you the miter angle on the side of the hip rafter and the edge bevel angle on the top of the hip rafter. 

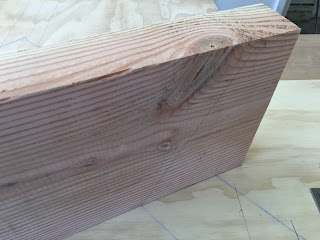
First I laid out the miter angle on the foot of the diverse hip rafter . Then I cut the compound cut with a saw blade bevel angle of 40.76275°

Saw Blade Bevel Angle
arctan(sin 65.32268 ÷ tan 46.50849) =  40.76275


Then I laid out an trait carré  = perpendicular , 90° angle and made the cut using 
Saw Blade Bevel Angle
90° - Roof Sheathing Angle
90°- 46.50849 =  43.49151


Next I marked off the 8 3/4" plumb height that I'm using on my profile-common rafters for the HAP.  Then from that mark draw perpendicular lines for the seat cut line. Then finish laying out the rest of the seat cut line using the diverse hip rafter slope angle.


The Hip Rafter Length  is developed from the profile-common rafter run to the ridge and marked on the one inside edge of the hip rafter material.  The Hip Rafter Head Cut, is cut using the same miter and saw blade bevel angle as the first cut
on the foot of the rafter.


Drawings to develop the draw down roof surface.


You can also use my Treteaux Angles calculator  on iPhone to calculate the angles and check the dimension for the seat-claw #3 line on the draw down roof surface.

Main Slope Angle
18.43495
Adjacent Slope Angle
18.43495
Main Plan Angle
45.00000
Adjacent Plan Angle
45.00000
Hip Rafter Slope Angle
13.26268

R8-DP -- Diverse Hip Rafter slope angle, used at the foot cut
13.59458

R9-DP
3.01279
D-DP
41.98721
R10-DP
12.58747
PSBm-DP
71.56505
PSBa-DP
12.57063
SR4Bm-DP
48.01279
SR4Ba-DP
131.98721
R11m-DP Diverse Hip Rafter Miter Angle 
65.32272

P7m-DP
133.49152
P8m-DP
90.00000
P9m-DP
0.00000
P10m-DP
90.00000
P11m-DP
43.49152
P12m-DP
43.49152
P13a-DP
19.35965
P14a-DP
56.27325
P15a-DP  Bevel angle on the top of the Diverse Hip Rafter
46.50848

P16a-DP
18.43495
P17a-DP
54.86581
P18a-DP
43.49152
Skewed Purlin Rafter Rotation Angle
20.12000
Purlin Rafter Depth
9 1/2''in
Hip Rafter Depth
11 1/2''in
Hip Rafter Width
3 1/2''in
P19a-DP
112.37693
P20a-DP
24.12533
P21a-DP
62.35618
P22a-DP
25.39390
P23a-DP
11.73330
P24a-DP
41.52301
Seat Line Profile - Purlin Rafter Plan
30 1/16''in
Seat Line Profile - Purlin Rafter Roof
28 1/2''in

Seat Line Hip Rafter
36 3/8''in
Roof Sheathing Angle
46.50848
Claw Line 1
0
Claw Line #2
26 3/8''in
Claw Line 3 -- Seat lined used on the draw down roof surface
4 5/8''in

Claw Line 4
6 3/4''in


Sent from my iPhone

Secret Carpenters Circle for Canted Hip Rafters when you don't have an iPhone


Sunday, October 9, 2016

The French Guitarde by Adam Miller

Adam Miller  published an article in the Timber Framing Guild's magazine last month and since it was the first French guitarde model built in the United States by an American carpenter I wanted to share it on my blog.  It's great to see an American carpenter studying L'Art du Trait and understanding it like Adam.


-----------------------------------------

-Adam Miller, October 2016

When it came time for me to get serious about my compound joinery, I decided to work through a series of exercises in the Billon Freres classic, L'Art du Trait de Charpenterie. Originally published over a century ago, Billon Freres remains in print through Editions H. Vial in France.
The guitarde is a bold statement of what l'art du trait can create. Quite in contrast to today's world of computer modeling and speed squares, every piece of information required to build the guitarde is drawn on a single sheet of paper, the epure. In the photos, you can see the elevations of each component folded down around the central plan view of the guitarde. Lines from points in plan intersect with reference lines to define the curves in the elevations. Directly transferring series of points in plan and elevation onto the work-piece yield multiply curved components and the corresponding compound (and curved compound) cuts to mate them together into the guitarde.
The other photos show the two capucines I built as preludes to the guitarde. The first is rectangular in plan with irregular hips and jack rafters. The second is similarly framed, but adds the curved tenailles, or pincer braces. All of these forms are variations on hip framing.
These models range from about 8” to 12” wide, and the group photo shows all three in a single mortise cut in a massive pine log.


Update: Adam will be teaching a course on Building a French (Capucine/Guitarde) dormer this October 16th-20th 2017 at Will Beemer's Heartwood Timber Framing School located in the Berkshire Hills of western Massachusetts .

You can register for the class at the link below.


Saturday, September 3, 2016

Developing Bevel Angles on the Stick-Timber

After developing the bevel angles on the hip rafters and jack rafters I realized I could develop the bevel angles on the actual purlin rafter as well. The cuts on a purlin rafter are the same as frieze blocks.

Here's a picture of developing the purlin rafter miter and bevel angle on the stick for an equal pitched roof.


Here's a drawing showing how to develop the bevel angles for the hip rafter or jack rafter on an equal pitched roof.


Drawing showing how to develop the purlin rafter miter and bevel angles for equal pitched roofs, without using any math or geometry.


Drawing showing how to develop the purlin rafter miter and bevel angles for an unequal pitched roof, without using any math and just a little bit of geometry.


Some step by step drawings showing how to draw out the purlin rafter miter and bevel angles on the stick for an equal pitched roof with a plan angle of 45°.


Here's a drawing showing how to draw out the purlin miter and bevel angles for an Octagon roof with a plan angle of 67.5°. You would have to draw this out on a piece of plywood then transfer the dimensions for the miter and bevel to the stick.


Sunday, August 28, 2016

Compound Hip Rafter Head Cuts

There are different methods for cutting compound head cuts on hip rafters, I think this method makes laying out and cutting the compound cut pretty simple.


On our current framing project we have a 45° plan angle hip rafter, 60° plan angle hip rafter and a 15° plan angle hip rafter(sloping ridge) interesting at the same location. I used plumb lines from plan view of the hip rafters to layout the compound head cuts. On an equal pitched roof, we normally measure back half the thickness of the hip rafter material , perpendicular to the hip rafter head cut slope   line , and set our saw to a 45° saw blade bevel angle to cut a 45° plan angle hip rafter head cut. On these 6x12 hip rafters the intersection of two hip rafters required a 52.5° saw blade bevel angle. None of our saws would swing over to the 52.5 saw blade bevel angle so we had to cut some of the head cuts with a hand saw.


Here's the drawing I used to layout the hip rafter head cuts. You only need a full scale drawing of the hip rafters intersecting in plan view.


Using the plumb line dimensions in plan view of the hip rafters, allowed me to easily layout the 6x12 hip rafter head cut accurately without knowing or caring about the hip rafter bevel angle on the tops of the hip rafters.  Knowing the intersecting angles of the hip rafters in plan view did allow us to set our saws to the saw blade bevel angle. However, like most saws the saw blade bevel angle settings on the saw are never accurate. We made a couple of test cuts to determine the correct bevel angle on our saws.  


We would have probably had to finish off the head cuts with a hand saw, even if we had a Mafell MKS185Ec carpenter's portable circular saw.
The 18" Mafell beam saw blade bevel swings over to 60°, but I'm not sure about the depth of the cut at 52.5°. At a cost of $5,410.00 , that would have put the cost of the hip rafter head cuts at $2705.00 per rafter.