This current European Championship for Carpenters task model is extremely complex. I wonder if the apprentice carpenters had
the drawings before the competition? Or how many of them actually completed the
task model?
Here's a couple of drawings of the European Championship for Carpenters task model 2014. I'm still not done, but you can get an general idea of how much geometric roof framing knowledge each of the apprentice carpenters must know to complete the task model.
3D drawing of the European Championship for Carpenters task model. I'll use this drawing to verify the geometry I develop is correct.

Basic ground plan of the roof.

Technique to develop the eave line that is level in plan view.

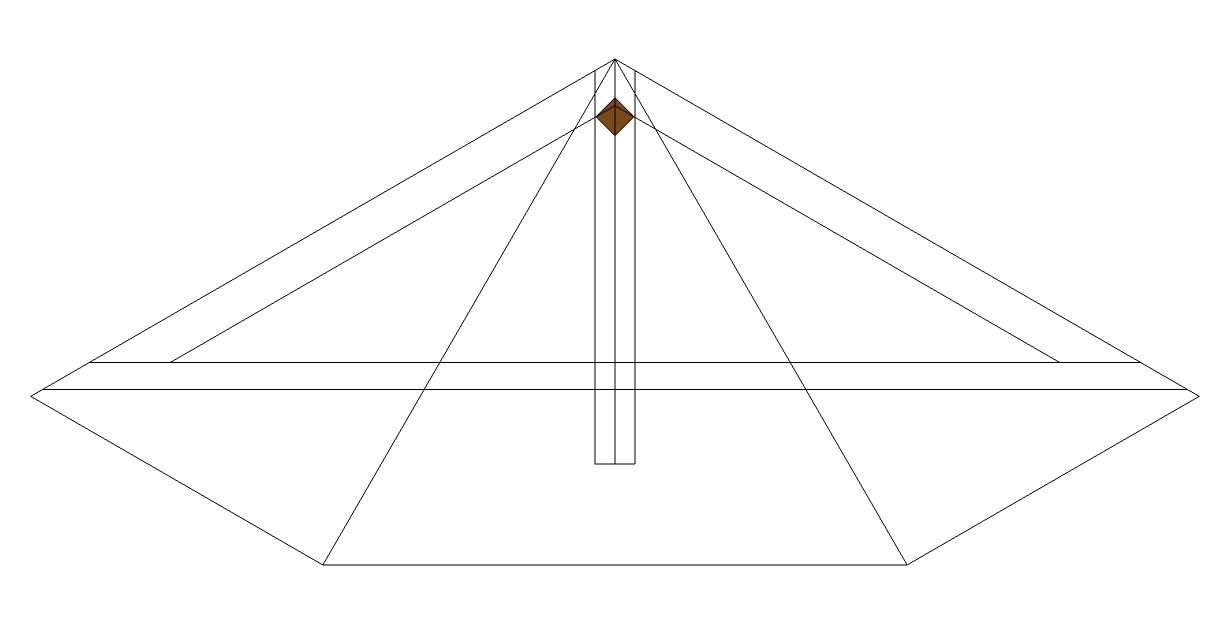
3D drawing of the hip rafters and raking/sloping plate lines.

3D drawing with plumb lines to establish the location of the jack rafters and purlin rafters on the roof surface.


Drawing of the base that holds up the roof.
Front sloped legs of the base.


Drawing with the legs and plates of the base.


Trying to establish the rotation of the hip rafter rotated into the roof surface.

Developing the profile rafter slope angle on the sides of the task model.

Raccord drawing of the roof surface.

Raccord drawing of the roof surface with the rafters on the roof surface.

Trying to develop the correct location of the rafters on the roof surface.

Drawing showing the technique I used to establish the miter line on the roof surface using the hip rafter backing triangle and the depth of the profile rafter.

Drawing with the hip rafter foot print developed from the hip rafter material block rotated to the hip rafter backing angle.

Drawing showing the development of the Devers De Pas line for the DP side of the hip rafter rotated into the roof surface. Sure am glad I studied the Treteaux angles.

Transferring the lines to the sides of the timbers on the rof surface.


Tréteaux Angles
tréteau à devers

Roof Eave Angle = 126.58678
SS = Main Rafter Slope Angle = 38.65981
S = Adjacent Rafter Slope Angle = 37.05220
__________________________________________________
DD = Main Plan Angle = 60.00000
D = Adjacent Plan Angle = 66.58678

R1 = Hip Rafter Slope Angle = 34.71501
C5m Main Hip Rafter Backing Angle = 18.20076
C5a Adjacent Hip Rafter Backing Angle = 13.85266
Valley Sleeper Saw Blade Bevel Angle = 90° - (C5m + C5a) = 57.94657

P2m = Main Jack Rafter Side Cut Angle = 24.26751
90° - P2m = Main Roof Sheathing Angle = 65.73249
P2a = Adjacent Jack Rafter Side Cut Angle = 19.06421
90° - P2a = Adjacent Roof Sheathing Angle = 70.93579
Purlin Depth = 70
Hip Rafter Depth = 60
Hip Rafter Width = 60
DP Side Claw Line DimensionsRoof Sheathing Angle70.93579°Seat Line for Rafters in Ground Plan Dimension116.17440Seat Line for Rafters on Roof Surface Dimension92.71727Claw Line #1 Dimension0.00000Claw Line #2 Dimension113.05613Claw Line #3 Dimension43.83167Claw Line #4 Dimension1.26481

Treteaux Angles
R8-DP
Tilted Hip Rafter Slope Angle on DP Side of Hip Rafter.
36.10362°
R9-DP
Horizontal Plane Rotation Angle for Tilted Hip Rafter on
DP Line from Footprint to Hip Rafter Run Line.
10.60575°
D-DP
Horizontal Plane Rotation Angle for Tilted Hip Rafter on
DP Line from Eave Line to Hip Rafter Footprint
55.98103°
R10-DP
Vertical Plane Rotation Angle from Plumb for Tilted Hip
Rafter on DP Line
15.12401°
PSBm-DP
Prism Footprint Saw Blade Bevel Angle Along side of Hip
Rafter Rotated into the Roof Surface Plane at Foot Of Hip Rafter
51.34019°
PSBa-DP
Prism Footprint Saw Blade Bevel Angle Along side of Hip
Rafter on DP Side at Foot of Hip Rafter
14.87719°
SR4Bm-DP
Prism Footprint Angle in Plan View at Eave Line
Intersection
70.60575°
SR4Ba-DP
Prism Footprint Angle in Plan View at Intersection of DP
Line and Profile Rafter Footprint Line in Plan View
109.39425°


Drawings with claw line development using the draw down technique.
No comments:
Post a Comment
Note: Only a member of this blog may post a comment.